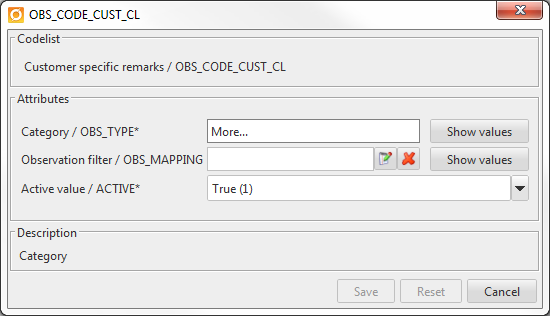
A filter is set where it is established what kind of object that should be filtered. This can be done in the codelist OBS_MAPPING_CL in the Codelist manager.
Note! This function requires Maintainer Advanced.
The filtering is done by naming a category and the filter. After that you specify what kind of object the filtering should act on. This is done by specifying Otype, Subtype, Inspection type and State in this order, by using an editor and the field ACCEPT.
The editor is opened by using the button that looks like a notebook ![]() .
.
By pressing Search you can select what Otype the filtering should be valid for. It is also possible to add the right Otype value directly into the field. The same goes for Inspection type.
Note! That the helpfunction only takes inspection types that are undefined i.e subtype=0 into consideration. For more information about this, see section Set up of multiple inspection plans
If no value is set for any of the fields, it is presumed that the filtering is valid for all values. When you are done, press the Add button and the filtering is displayed in the table and at the bottom of the form.
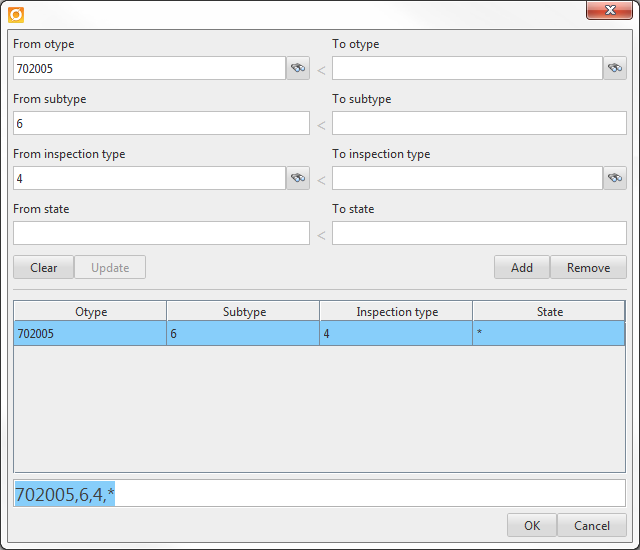
The image above displays a filtering for Otype 702005, Subtype 6 and all states for these objects. The inspection type that the filtering should be valid for in the example is codenum 4.
When the filter is completed you can select on what type of remark the filter should apply to. It is on the remark itself that the filter is applied, Remark mapping.
By pressing ![]() a filter can be selected and by pressing
a filter can be selected and by pressing ![]() a filter can be removed from the remark.
a filter can be removed from the remark.
By selecting the filter that should be used, the objects that the remarks are applied to, are displayed. I.e. the same information that was added as ACCEPT for the remark mapping.
It is also possible to add filter to several remarks at the same time. Select the remarks in the codelist and edit them.
In the example above you can see that the selected remarks are in different categories and there is also several different mappings for these remarks.
By pressing the button Show values, you will get a compilation of the categories that is selected and the current type of mapping that has been made.
If you press the edit-icon it is possible to select what filtering that should be applied for the selected remarks. Hence, it is here possible to edit several remarks at the same time.