In the resource planning view, you can book the personnel and machine resources defined in Organizer for the activities. You can also cancel and rebook them.
Book resources for activities
1.Show the resource planning view, press Show resources![]() .
.
2.Show both resource needs and bookings by selecting the options Demands status and Demands and bookings in the Resources menu.
3.Select the tool Personnel resource booking![]() . In the calendar, the symbol for the booking is shown tool next to the mouse cursor.
. In the calendar, the symbol for the booking is shown tool next to the mouse cursor.
4.Double-click the activity resource bar. WorkPlanner now matches available resources with the defined need during the activity.
The matching resources are displayed as wide light blue rows. The resource's bookings before and after the task are displayed as horizontal bars in a shade darker blue.
You can book resources for more than one activity during the same time. The horizontal bars for the time the resource is double-booked are shown in red with black, diagonal stripes.
The list shows the resources that can be used for the specific utility. By default, the resources that match the resource type and category are displayed. You can display the resources that match competence/class by selecting Filter resources by Competence/Class in the Resources menu.
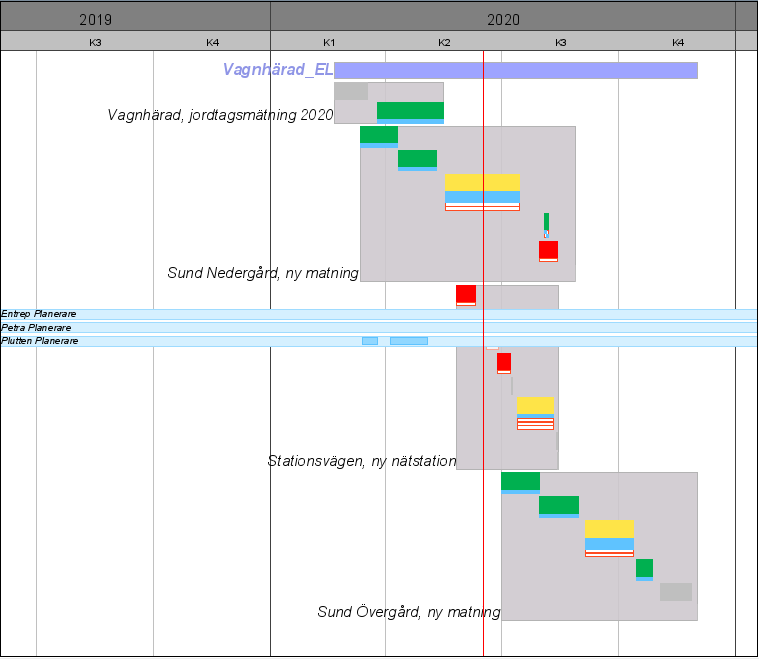
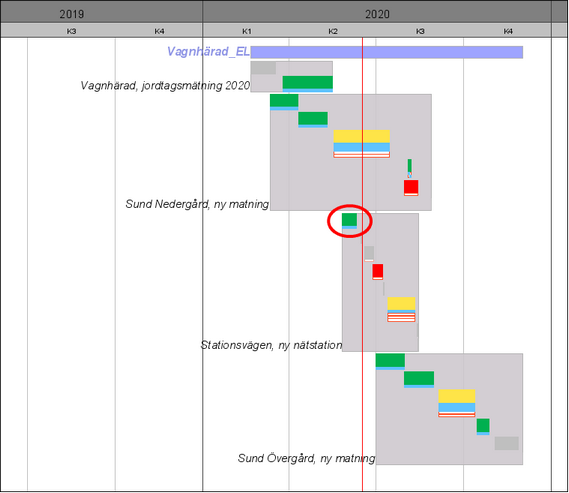
5.Book the resource by double-clicking the row for the selected resource. The task bar turns yellow or green and the resource bar is filled with blue color. The name of the booked resource is displayed to the left of the task and the rows of the unselected resources disappear.
Cancel resources
1.Show the resource planning view using the button Show resources![]() .
.
2.View resource needs and bookings by selecting both the options Demand status and Demands and bookings in the Resources menu.
3.Select the tool Personnel resource booking![]() . In the calendar, the symbol for the booking is shown tool next to the mouse cursor.
. In the calendar, the symbol for the booking is shown tool next to the mouse cursor.
4.Select the filled blue row for the booked resource you want to cancel.
5.Select Cancel from the menu that appears. The resource disappears and the resource line becomes unfilled.
Rebook resources
To rebook resource for an activity, select the resource you want to rebook, and then select Rebook in the dialog that appears.
Book absence for a specific resource
1.Select the tab Resources in the south panel.
2.Press Search to open the resource result list.
3.Mark the resource you want to book. The east panel opens.
4.Select the tab Bookings in the east panel.
5.Press Unavailable. A dialog window opens.
6.Enter reason. Note, the list is empty by default. Which alternatives that should be available is handled and built by each ompany using the codelist manager.
7.Press Add. A dialog window opens.
8.Enter date for absence.
9.Press OK. The date dialog closes.
10. Press OK. The dialog window for absence closes. The absence is now visible in the column Other bookings.
Book Standby for a specific resource
1.Select the tab Resources in the south panel.
2.Press Search to open the resource result list.
3.Mark the resource you want to book. The east panel opens.
4.Select the tab Bookings in the east panel.
5.Press Standby. A dialog window opens.
6.Enter reason. Note, the list is empty by default. Which alternatives that should be available is handled and built by each ompany using the codelist manager.
7.Press Add. A dialog window opens.
8.Enter date for absence.
9.Press OK. The date dialog closes.
10. Press OK. The dialog window for standby closes. The Standby is now visible in the column Other bookings.