The user manager is divided into three tabs:
•Users
•Roles
•Departments
|
Configuration of customer specific columns is possible, then the Customer specific information tab will be added. Contact the account manager or Digpro Support for more information. |
|
If a user to be deleted has changesets with unposted changes, a warning window will appear. The window lists all of the user's changesets and shows how many changed items each set contains. Deleting a user with non-empty changesets should be done with great care. The action cannot be undone, and all changesets belonging to the user are permanently deleted, regardless of the changes they contain. Before deleting such a user, you should ensure that the changes contained in the changesets do not affect other operations. |
Open the User manager
1.In the menu bar, select Administration > User manager (Ctrl+Shift-U).
The Users tab displays a table of all users in the system and their registered contact details. The table contains, among other things:
•Whether the user is active.
•The expiry date of a login (if specified).
•Date and time of last login.
•Notes, if any.
•SSO name.
Create a new user
1.Press Create a new user ![]() . A dialog opens.
. A dialog opens.
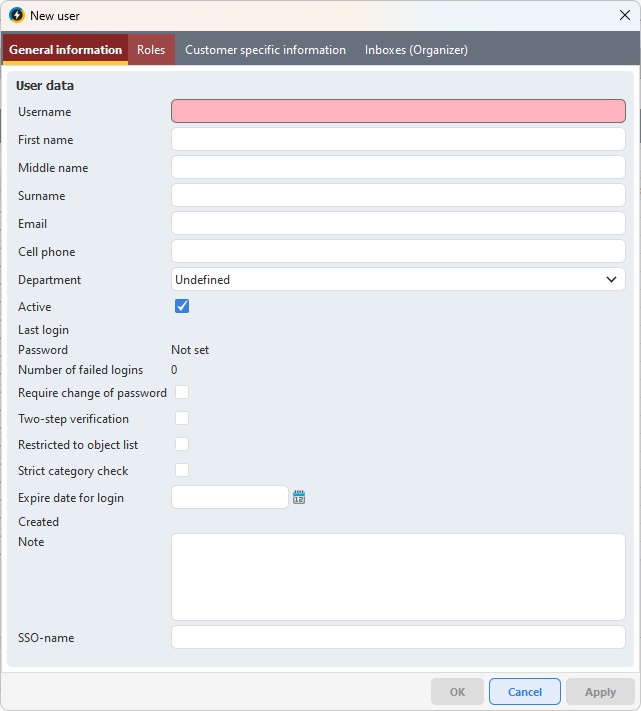
2.Fill in the fields under General information. Fields marked in pink are mandatory.
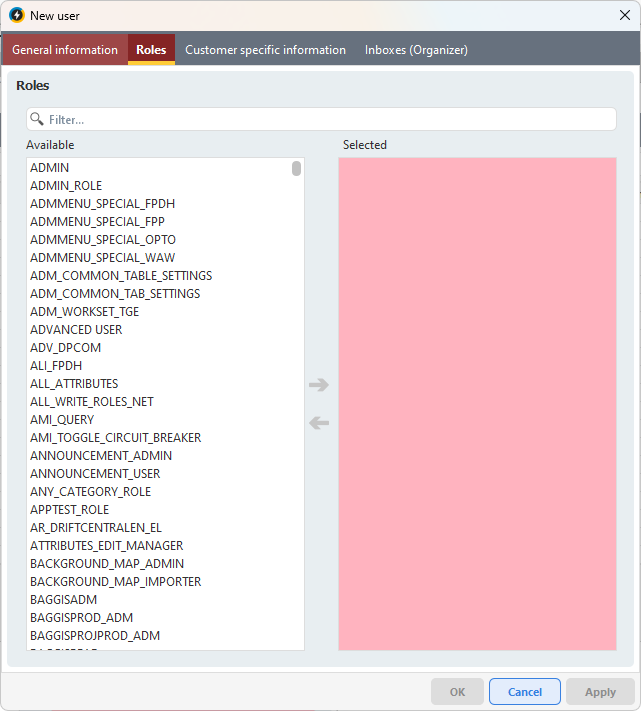
3.In the Roles tab, select the roles that the user should have access to. Move roles from the Available list to the Selected list using the arrow buttons. Hover over a role for more information.
4.For Organizer, in the Inboxes tab (Organizer), select which inboxes the user should have access to.
5.Press Apply. A dialog opens.
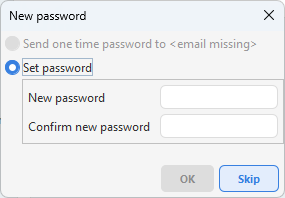
6.Enter and confirm the password, press OK. If one-time passwords are to be used, the email field must be filled in. The user is saved in the Users tab and can now log in.
Create new user from a copy
1.Press Create a new user from a copy of the selected user ![]() . A dialog opens.
. A dialog opens.
2.The fields under General information can be edited. Roles and inboxes are copied from the original user. Fields marked in pink are mandatory.
3.Press Apply. A dialog opens.
4.Enter and confirm the password, press OK. If one-time passwords are to be used, the e-mail field must be filled in. The user is saved in the User tab and can now log in.
Edit user
1.Select the user to be changed and press ![]() .
.
2.Make the desired changes.
3.Press Apply to save the new information.
Two-step verification
When creating or editing a user, you can enable Two-step verification. This requires the user to scan a QR code and enter a verification code from Google Authenticator, for example, when logging in.
If two-step verification is set, the following buttons will be enabled the next time the form for the user is opened:
|
Generate new key: Create a new key, a QR-code is generated. This code can then be scanned and require a verification code from Google Authenticator. Enter the code and press the button OK. |
|
Remove key: The user needs to generate a new key at the next login. |
|
Forget all users on all computers: Forgets all the users on all computers and forces the user to enter a code at the next login |
Configure Two-step verification
|
Contact your account manager or Digpro support for more information about setting up two-step verification. |
The configuration can be set to:
•Disabled - two-step verification is turned off. However, the code is verified for users who already have it entered.
•Optional - two-step verification can be used.
•Force - two-step verification is required at login.
Expire date for login
When you create or edit a user, you can set a date when the login will expire. After this date, the user will automatically become inactive. This is useful for fixed-term employment, for example.
SSO-name
|
For the function to work properly, special configuration is required. Contact Digpro Support or your account manager for more information. |
In the SSO name field, there is a button Fetch information from Windows Active Directory account ![]() . With it, you can retrieve information from Active Directory based on the SSO name.
. With it, you can retrieve information from Active Directory based on the SSO name.
Delete users
|
If a user to be deleted has changesets with unposted changes, a warning window will appear. The window lists all of the user's changesets and shows how many changed items each set contains. Deleting a user with non-empty changesets should be done with great care. The action cannot be undone, and all changesets belonging to the user are permanently deleted, regardless of the changes they contain. Before deleting such a user, you should ensure that the changes contained in the changesets do not affect other operations. |
|
You can delete a user if, for example, it has been created by mistake. However, we recommend that you do not delete users who have edited objects in the system. This may affect the traceability of historical objects and may lead to the risk of creating a new user with the same name. Instead, you should make the user inactive by unchecking the Active checkbox. |
|
You cannot delete the user you are logged in as - a message appears and the deletion is canceled. However, you can delete other users, even if they are logged in. |
1.Select the user or users you want to delete and press Delete the selected user ![]() . A dialog opens.
. A dialog opens.
2.To confirm the deletion, press Yes. The user disappears from the Users tab.
Filtering
To search for specific users, you can use the Filter search field.
The button Choose to only show users with specific roles ![]() allows you to show only users with specific roles.
allows you to show only users with specific roles.
1.Press ![]() to open the Filter window.
to open the Filter window.
2.Select a role from the drop-down list, or select Select multiple... to highlight multiple roles and press OK.
3.Press OK. All users who have the selected roles assigned to them are listed in the search results.
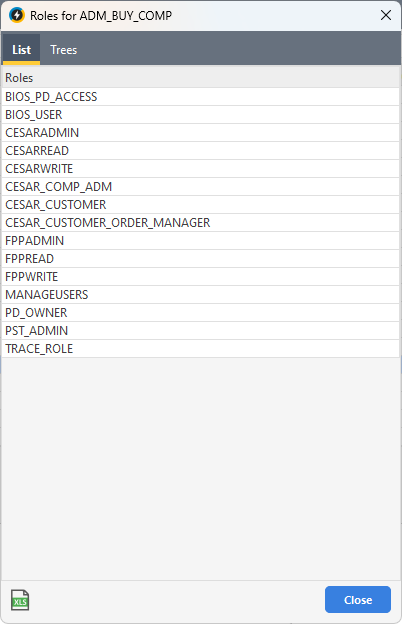
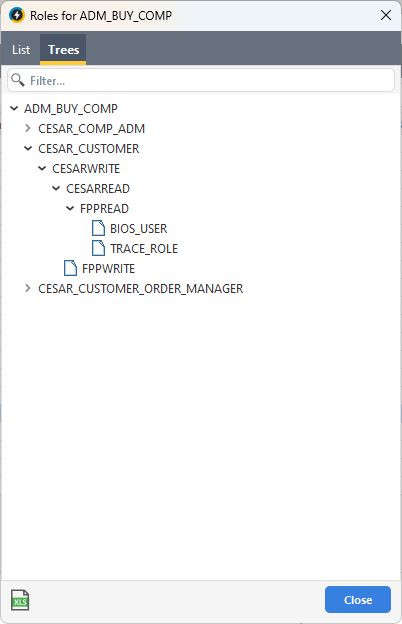
View roles for one or more users
This feature is useful when you want to see what roles a user has, or compare roles between multiple users. For example, this can be useful when one user sees something in the application that another does not.
1.Select one or more users in the list.
2.Right-click and select Show roles for [user] or Show roles for multiple users.
oIf you selected one user, a window opens with that user's roles.
oIf you selected multiple users, a window opens for each selected user.
You can choose to display the information as List or Tree. Tree view also shows which roles the roles contain.
Managing roles for multiple users simultaneously
1.Select multiple users using Shift or Ctrl.
2.Right-click and select Handle roles. A dialog opens.
|
Selected users are in the top part under the Selected users section. Under the Roles section, all available roles are listed. The numbers in brackets show how many of the selected users already have the specific role. |
3.Assign or remove roles using the arrow buttons.
4.Press Save.
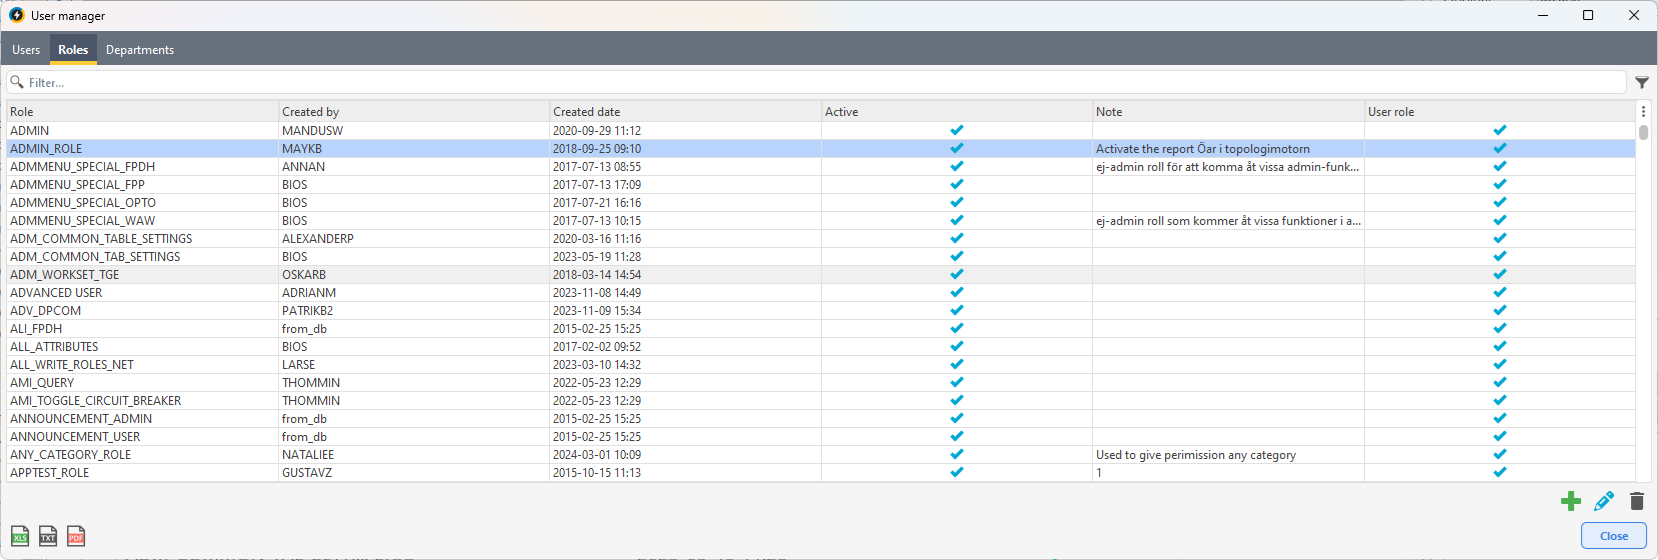
The Roles tab displays a table of all roles in the system. The table contains, among other things:
•Who created the role.
•The date of creation.
•Whether the role is active.
•Any notes (for example, a description of the role).
See section Roles for more information.
Create a new role
1.Press Create a new role ![]() . A dialog opens.
. A dialog opens.
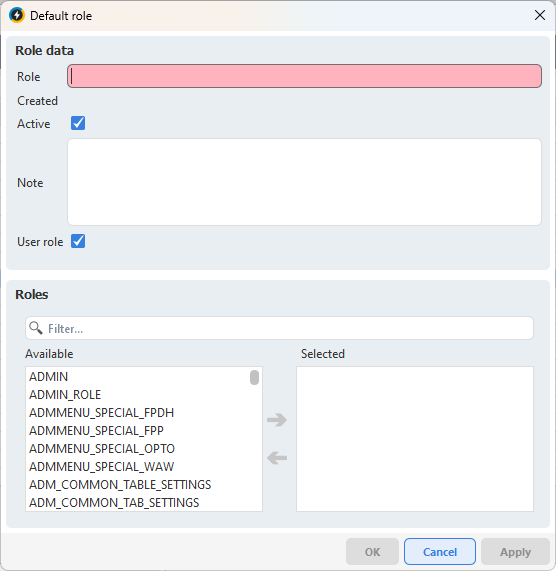
2.Fill in the role information. Fields marked in pink are mandatory.
3.If the new role should contain some already existing roles, select them. Hover over the different roles to see more information.
4.Press Apply. The new role is added to the Roles tab.
Edit an existing role
1.Select the role you want to change and press Edit the selected role ![]() . A dialog opens.
. A dialog opens.
2.Make the desired changes.
3.Press Apply to save the new information.
Delete a role
1.Select the role you want to delete and press Delete the selected role ![]() . A dialog opens.
. A dialog opens.
2.To confirm the deletion, press Yes. The role disappears from the Roles tab.
Filtering
To search for specific roles, you can use the Filter search field.
The button Choose to only show roles with specific subroles ![]() allows you to show only roles with specific sub-roles.
allows you to show only roles with specific sub-roles.
1.Press ![]() to open the Filter window.
to open the Filter window.
2.Select a sub-role from the drop-down list, or select Select multiple... to select multiple sub-roles and press OK.
3.Press OK. All roles that have the selected subroles assigned to them are listed in the search results.
Show roles for one or more roles
This function is useful when you want to see which roles a particular role contains or is part of, or compare several roles at once.
1.Select one or more roles in the list.
2.Right-click and select Show roles for [role] or Show roles for multiple selected roles.
oIf you select one role, a window opens with that role's information.
oIf you select multiple roles, a window opens for each selected role.
You can choose to display the information as:
•List down - roles that the role contains.
•List up - roles that the role is part of.
•Tree down - roles that the role contains, in tree structure.
•Tree up - roles that the role is part of, in tree structure.
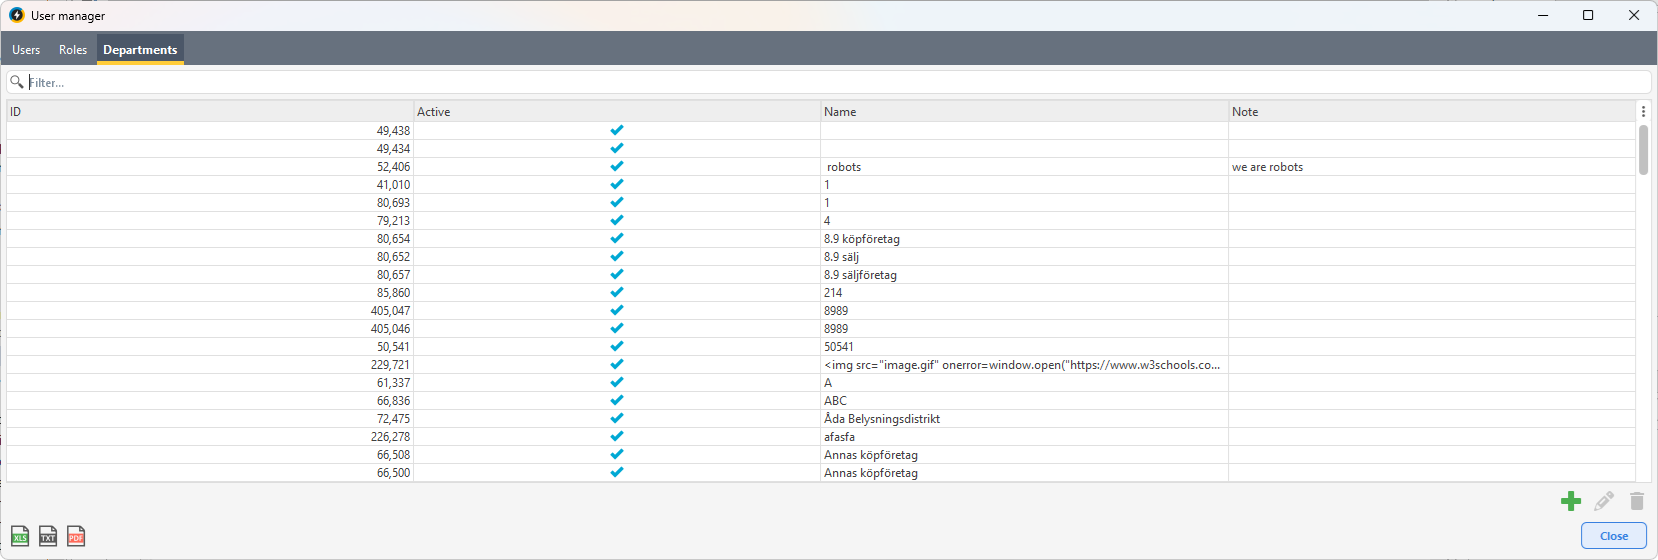
Departments
The Departments tab displays a table of all departments in the system. Here, as an administrator, you can add new departments, which can then be linked to users.
In the Edit user dialog, there is a drop-down menu where you can select from all created departments.
To search for specific departments, you can use the Filter search field.
Create a new department
1.Press Create a new department ![]() . A dialog opens.
. A dialog opens.
2.Fill in the information. Fields marked in pink are mandatory.
3.Press Apply. The new department is added to the Departments tab.
Edit department
1.Select the department you want to change and press Edit the selected department ![]() . A dialog opens.
. A dialog opens.
2.Make the desired changes.
3.Press Apply to save the new information.
Delete department
|
You cannot delete a department that is assigned to a user. |
1.Select the department you want to delete and press Delete the selected department ![]() . A dialog opens.
. A dialog opens.
2.To confirm the deletion, press Yes. The department disappears from the Departments tab.
Reports in the query tool
Under Query Tool (F11) > Reports > Users and roles, there are reports that can be useful when managing users and roles:
•Userinfo
•Users with role
•Roles for user
•Users role difference
•Roles that give permission on otype/subtype
•Users changed
•Deactivated users
•User roles changed
•Roles changed
•Roles for roles changed
Users with role
In the query tool the report Users with role can be used to search for all the users that has a specific role.
1.In the Reports tab of the query tool, select Users and Roles > Users with role.
|
It is only users with administration rights for the user manager that can access and use this report. |
The role is selected by using the drop-down menu Role. The drop-down menu contains all the roles that exists in the system, the field is mandatory and needs to be entered in order for the button Search to be enabled.
It is also possible to select a specific organization unit (company) in the drop-down menu Organization unit. This requires that the system users has been divided into different Organization units/Companies. See section Companies for more information.
The search result will be limited to the organization unit/company that has been selected in the drop-down menu Organization unit.
If you want to include inactivated users to the search result as well, use checkbox Include inactivated users. The users that have been inactivated in the user manager will hence be displayed in the search results as well as the activated users.
The search result includes the columns Changeset, First name, Surname, SSO-name, Email, Cell phone, Company and Active (1=active 0=inactive).
Roles for user
In the query tool the report Roles for user can be used to search for all the roles that a specific user has.
1.In the Reports tab of the query tool, select Users and Roles > Roles for user.
|
It is only users with administration rights for the user manager that can access and use this report. |
The field User name is mandatory and needs to be entered in order for the button Search to be enabled. All the user name that matches the entered one will be displayed in the search result together with the roles that the user has. The result will be sorted per user.
It is also possible to select a specific organization unit (company) in the drop-down menu Organization unit. This requires that the system users has been divided into different Organization units/Companies. See section Companies for more information.
If you want to include inactivated users to the search result as well, use checkbox Include inactivated users. The users that have been inactivated in the user manager will hence be displayed in the search results as well as the activated users.
The search result includes the columns Username, Role, Name, Last name, SSO-name, Email, Cell phone, Company name (organization unit/company), Active (1=active 0=inactive).
Users role difference
In the query tool the report Users role different can be used to compare roles between two users.
1.In the Reports tab of the query tool, select Users and Roles > Users role difference.
|
Both user names need to be entered correctly in order to obtain a correct result for the roles. If one of the user names are misspelled, while the other user name is spelled correctly, you will not obtain a search result. |
The mandatory fields User needs to be entered with the user names that you wish to compare, in order for the button Search to be enabled.
The search result displays the roles that differs between the two users by the columns Only and Role.
The column Only, lists the user name while the column Role lists the roles.
Roles that give permission on otype/subtype
In the query tool, the Roles that give permission on otype/subtype report can be used to generate a list of roles showing whether they have read or write access for a given otype and subtype, and whether the permission is directly assigned to the role or inherited.
1.In the Reports tab of the query tool, select Users and Roles > Roles that give permission on otype/subtype.
Users changed
The report User Changed shows which users have been changed, the types of changes that have been made, when they were made and by whom. The report also shows whether the user is active or inactive.
1.In the Reports tab of the query tool, select Users and Roles > Users changed.
Narrow your search by:
•Entering Username of the changed user
•Entering the username of the person who made the change in the field Changed by
•Filtering by the Type of change (Created, Updated or Deleted) or All of these types of changes
•Entering the time period for when the changes have been made in the fields Only before and Only after
The search result contains the columns Type of change, Username, Name, Last name, SSO-name, Email, Cell phone, Active (1 = active, 0 = inactive), Changed by and Change date.
User roles changed
The report User roles changed shows which users have been changed, the types of changes that have been made, which roles that have been assigned to or removed from the users, when the changes were made and by whom.
1.In the Reports tab of the query tool, select Users and Roles > User roles changed.
Narrow your search by:
•Entering Username of the changed user
•Entering the username of the person who made the change in the field Changed by
•Filtering by the Type of change (Added or Removed) or All of these types of changes
•Entering the time period for when the changes have been made in the fields Only before and Only after
The search result contains the columns Type of change, Username, Role, Changed by and Change date.
Roles changed
The report Roles changed shows which user roles have been changed, what types of changes that have been made, when they were made and by whom. The report also shows whether the user role is active or inactive.
1.In the Reports tab of the query tool, select Users and Roles > Roles changed.
Narrow your search by:
•Entering the Role of the changed role
•Entering the username of the person who made the change in the field Changed by
•Filtering by the Type of change (Created, Updated or Deleted) or All of these types of changes
•Entering the time period for when the changes have been made in the fields Only before and Only after
The search result contains the columns Type of change, Role, Active (1 = active, 0 = inactive), Changed by and Change date.
Roles for roles changed
The report Role for roles changed shows which user roles whose roles have been changed, what types of changes that have been made, when they were made, and by whom. Here, the role name is used as the username.
1.In the Reports tab of the query tool, select Users and Roles > Roles for roles changed.
Narrow your search by:
•Entering the Username of the changed role
•Entering the username of the person who made the change in the field Changed by
•Filtering by the Type of change (Added or Removed) or All of these types of changes
•Entering the time period for when the changes have been made in the fields Only before and Only after
The search result contains the columns Type of change, Username (role), Changed by and Change date.