The Rights editor is a tool for reviewing and editing database roles in the system. It is used to control which object and subtypes a role is allowed to read, write or post. The tool acts as an interface to the rights tables in the database.
|
To edit rights, you must have the MANAGERIGHTS database role. |
|
It is not possible to create new roles in the rights editor. Roles must first be created in the User manager. For customers without new User manager, roles are created directly in Oracle. |
The tool contains two main tabs:
•Edit - Allows you to edit database roles.
•Show subtypes - Displays a list of all the object and subtypes in the system, which is useful when you want to find out the appropriate object and subtype ranges to put on selected roles.
Open the rights editor
1.In the menu bar, select Administration > Rights editor.
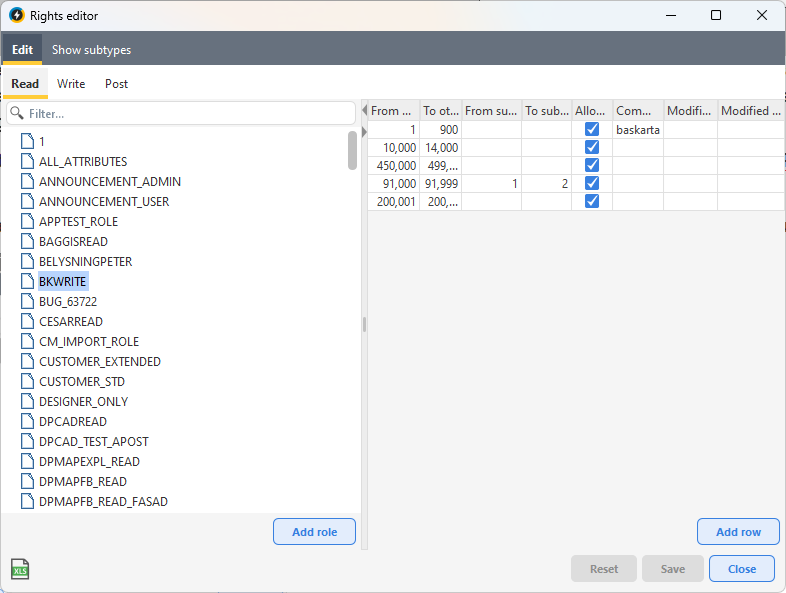
The Edit tab is used to fine-tune the rights to read, write and post. Here you edit which object types and subtypes a role has access to. If you make changes to read or write permissions, the row is marked with your name and the date of change. There are three sub-tabs: Read, Write and Post. All rights are defined in terms of ranges for object types and subtypes.
On the left are the roles set up in the database, each of which has at least one defined row in the tables for write rights (DP_WRITE_RIGHTS) or read rights (DP_READ_RIGHTS).
On the right, the current read, write and posting rights of the different roles are shown within ranges of object types and subtypes.
Empty fields
Empty range fields act as wildcards, that is, denote infinite lower and/or upper range limits.
Example of how ranges can be defined with empty fields:
From subtype |
To subtype |
Explanation |
|---|---|---|
3 |
|
All subtypes with numbers equal to or greater than 3. |
|
14 |
All subtypes with numbers less than or equal to 14. |
|
|
All subtypes |
2 |
2 |
Only subtypes with number equal to 2. |
Edit read or write rights
1.In the Edit tab, select the Read or Write sub-tab.
2.Select a role on the left.
3.Edit the From otype, To otype, From subtype or To subtype fields.
|
Empty fields act as wildcards, i.e. denote infinite lower and/or upper range limits. |
4.Check or uncheck the Allowed box to allow or deny the right.
5.If desired, fill in the Comment field to describe the content of the range.
Add a row
1.In the Edit tab, select the Read or Write sub-tab.
2.Select a role on the left.
3.Press Add row under the table on the right.
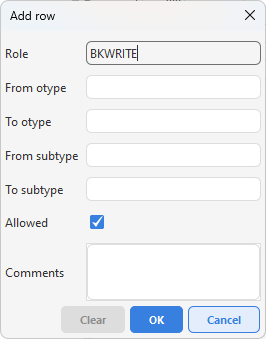
4.Fill in the desired values for the ranges object type and possibly subtype. Rights for states can only be defined for write rights, not read rights.
5.Check or uncheck the Allowed box to allow or deny the right.
6.Press OK.
Delete one or more rows
1.Right-click on one or more rows and select Delete row(s).
|
If you delete all the rows in a table, a warning message will appear. |
2.Press Save to save changes or Reset to undo.
|
Removing a role from the selectable list does not mean that it has been deleted from the system. To delete a role, this must be done in the User manager. For customers not using the new User manager, the roles need to be deleted in Oracle. |
Add a role
|
Please note that the role you enter must already exist in the database. |
1.Press the Add role button.
2.Enter the name of the role (mandatory).
3.Enter the desired range values for the right.
4.Check or uncheck the Allowed box to allow or deny the right.
Edit Post rights
1.In the Edit tab, select the Post sub-tab.
2.Select a role on the left.
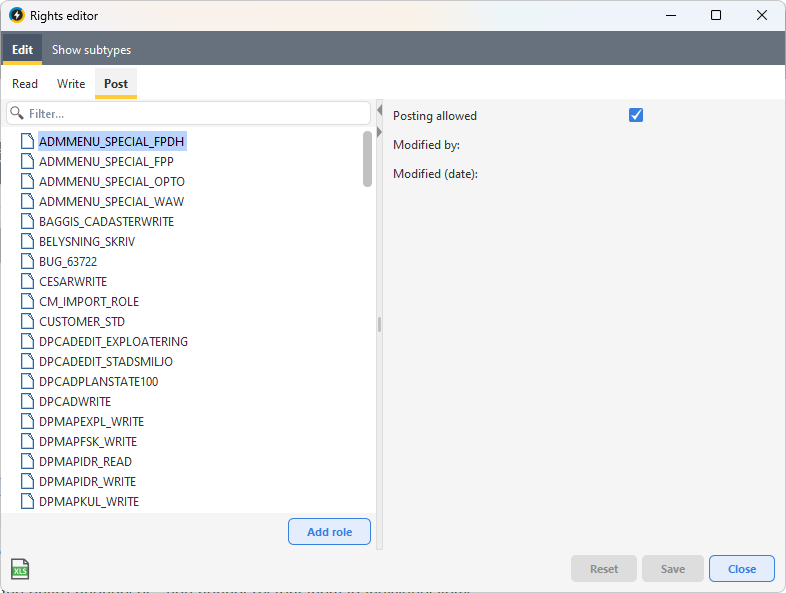
3.Check or uncheck the Posting allowed box.
|
Posting rights apply to the entire changeset - you cannot restrict them to individual objects. |
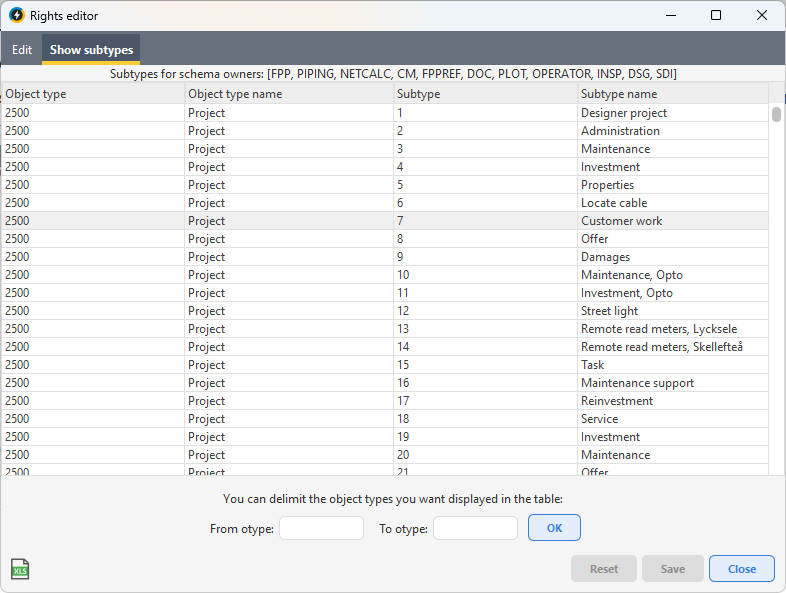
The Show subtypes tab helps you to find suitable range limits for object types and subtypes. The table shows a sortable list of object types and subtypes in the system. Both types are indicated by type number and by type name in plain text.
You can choose to limit the object types that you want to appear in the list by entering a range in the text boxes at the bottom of the window.