All processes needs to have one Start event and one End event, these are automatically created with the process.
|
In the end event, there is a Terminating checkbox. Check the box to end the entire process regardless of the activities or sub-processes in progress. |
Manually create a Start event or End event
A Start event is used to indicate the beginning of a process. A start event represents the starting point of a sequence of tasks that make up a process.
An End event is used to indicate the completion of a process. An end event represents the end point of a sequence of tasks that make up a process.
1.In the Create tab, select Start event or End event and press Place object or double-click. A dialog opens.
2.Optionally, set a Name and Description.
3.Press OK.
4.Place the start event and the end event in the process illustration.
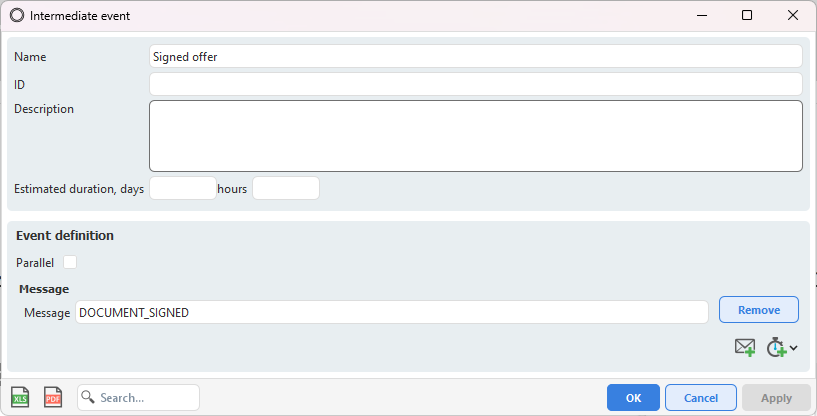
Create an Intermediate event
An Intermediate event is used to represent something that occurs during the execution of a process. When the event occurs, the process continues. In BPMN there are several types of intermediate events:
•Message ![]() - Define a message for the event. Enter the ID for the desired message.
- Define a message for the event. Enter the ID for the desired message.
|
If the process is linked to a workflow where documents are sent for signing via Scrive, a message can be used to trigger the intermediate event when the signing is completed. Use the message ID DP_DOCUMENT_SIGNED for the event to react to a document being signed. Once the document is signed via Scrive, the message is automatically sent to the process. For the process to react to the message, it needs to be in the intermediate event at the time of signing. If this is the case, the process automatically continues from the event. |
|
In the fields Estimated duration, days and hours, you specify how long the message event should last. When the process is linked to a task in Organizer, the specified time will be displayed as the event's start and end time. The start time is determined when the process reaches the event, and the countdown begins based on the time you have entered. The end time is calculated from this time span. |
•Add duration ![]() - Define a duration from when the event is activated. When the process reaches the event, it will be activated and start counting down to the time you have set.
- Define a duration from when the event is activated. When the process reaches the event, it will be activated and start counting down to the time you have set.
•Add date ![]() - Define a specific date for the event.
- Define a specific date for the event.
•Add weekday ![]() - Define a specific date for the event based on week.
- Define a specific date for the event based on week.
1.In the Create tab, select Intermediate event and press Place object or double-click. A dialog opens.
2.Optionally, set a Name and Description.
3.Press the icon for the type of event definition you want to add.
|
You can add multiple messages and times to the event. The Parallel box is used when there are multiple event definitions. If the box is checked, the process waits until all event definitions have occurred before continuing. If it is not checked, it is sufficient that one of the event definitions occurs. |
4.Press OK to create the event.
5.Place the intermediate event in the process illustration.
Scenario:
An offer needs to be signed by the customer before installation consent can be given.
•After the offer is sent for signing via Scrive, the process should pause and wait for signing.
•Once the customer has signed the document, the process should continue automatically to the next step.
Intermediate event with message ID DP_DOCUMENT_SIGNED
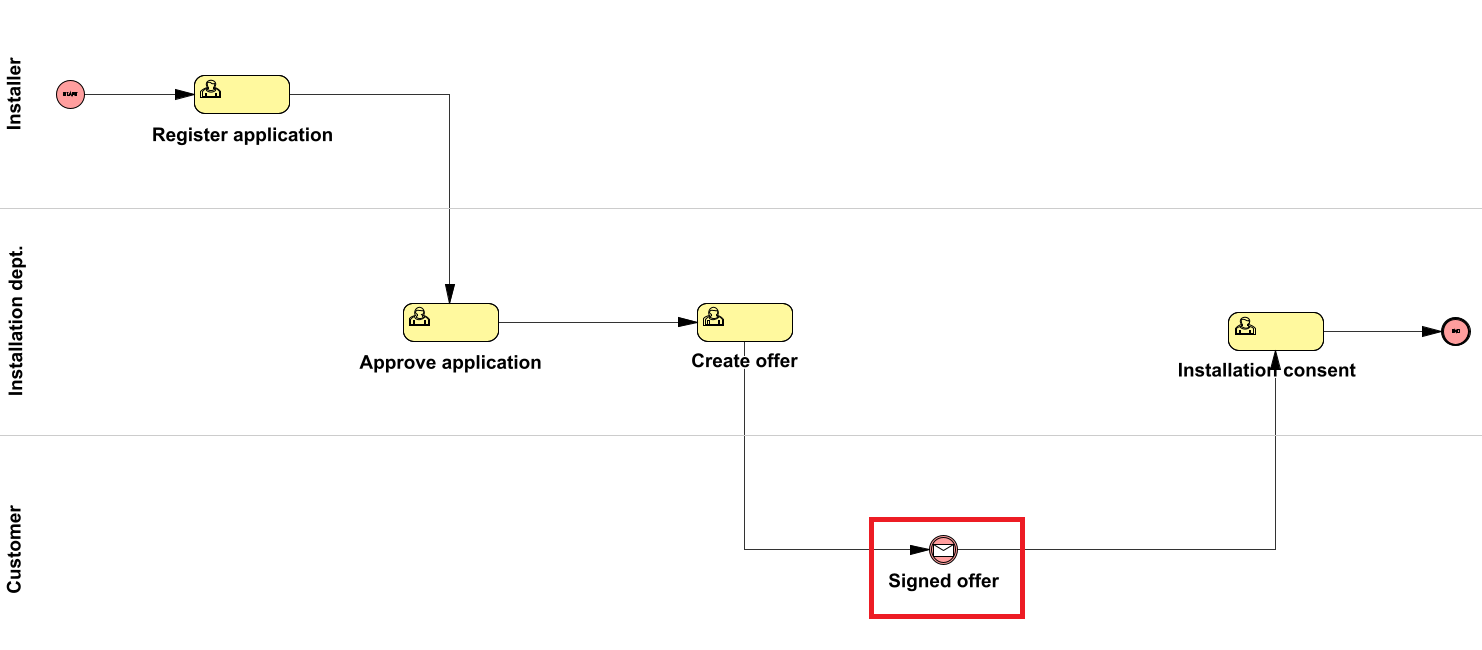
Example of an application process with an intermediate event with message ID DP_DOCUMENT_SIGNED
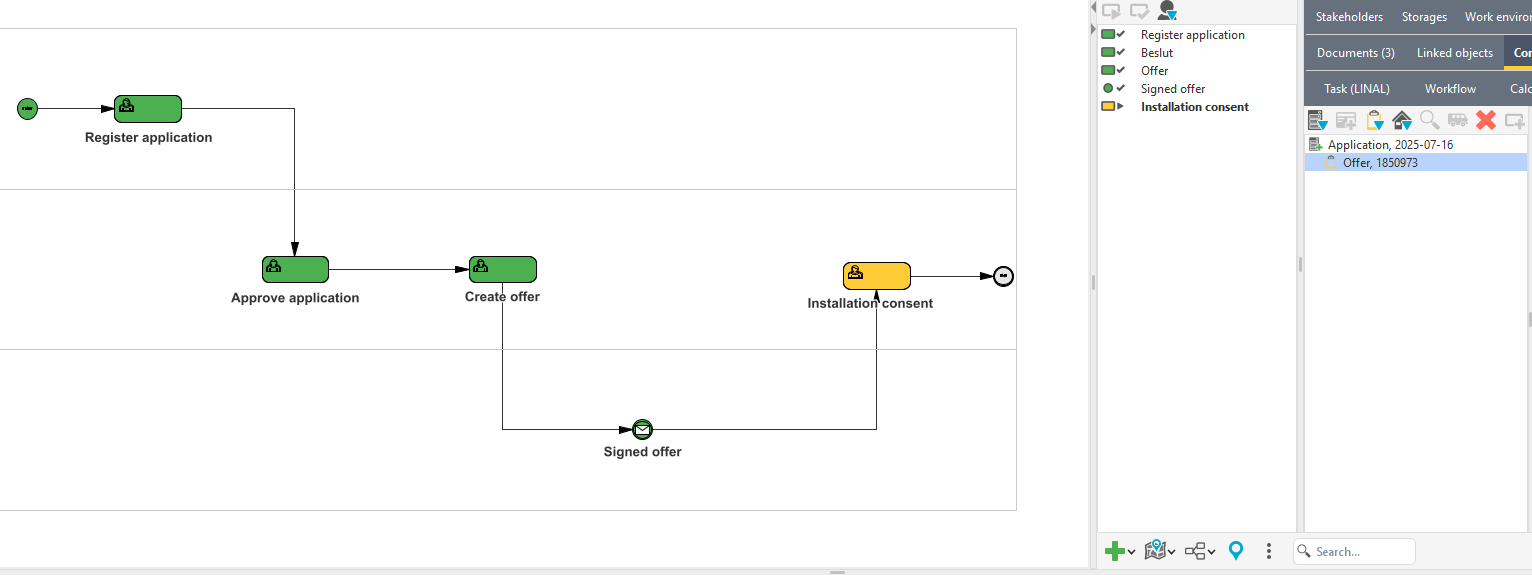
The same process visualized in Organizer after mapping to a task template. The user tasks Register application, Approve application and Create offer have been completed and finished manually. In Create offer, an offer was sent for signing via Scrive. When the customer signed the document, the intermediate event with message ID DP_DOCUMENT_SIGNED was automatically triggered, allowing the process to continue to Installation Consent.
Test message and timer events
|
To test message and timer events, the DSG_WORKFLOW_ADMIN role is required. |
The test function can be used to ensure that the process reacts as expected to messages and timer events. It is particularly useful in processes with event-based gateways, event sub-processes or multiple alternative events.
|
The function is intended for test tasks, not live tasks. It is not possible to reset the process after the test. |
1.In Organizer’s south panel, right-click the desired task and select Process testing.
2.Select the desired testing:
oSend Message - Used to manually trigger a message event in the process.
▪Type a message ID and press OK.
▪The message ID must match the one used in a message event in the process.
▪If there is such an event waiting for the specified ID, it is triggered and the process continues accordingly. If no matching message is found, nothing happens.
oValidate timer events - Used to manually trigger timer events in the process, if their specified time has passed.
▪Press Validate to trigger the timer events that, based on their time settings, should have occurred at the time of testing.
▪The function checks all active timer events in the process.
▪Timer events that, according to their time setting, should have occurred at the time of testing are triggered immediately.